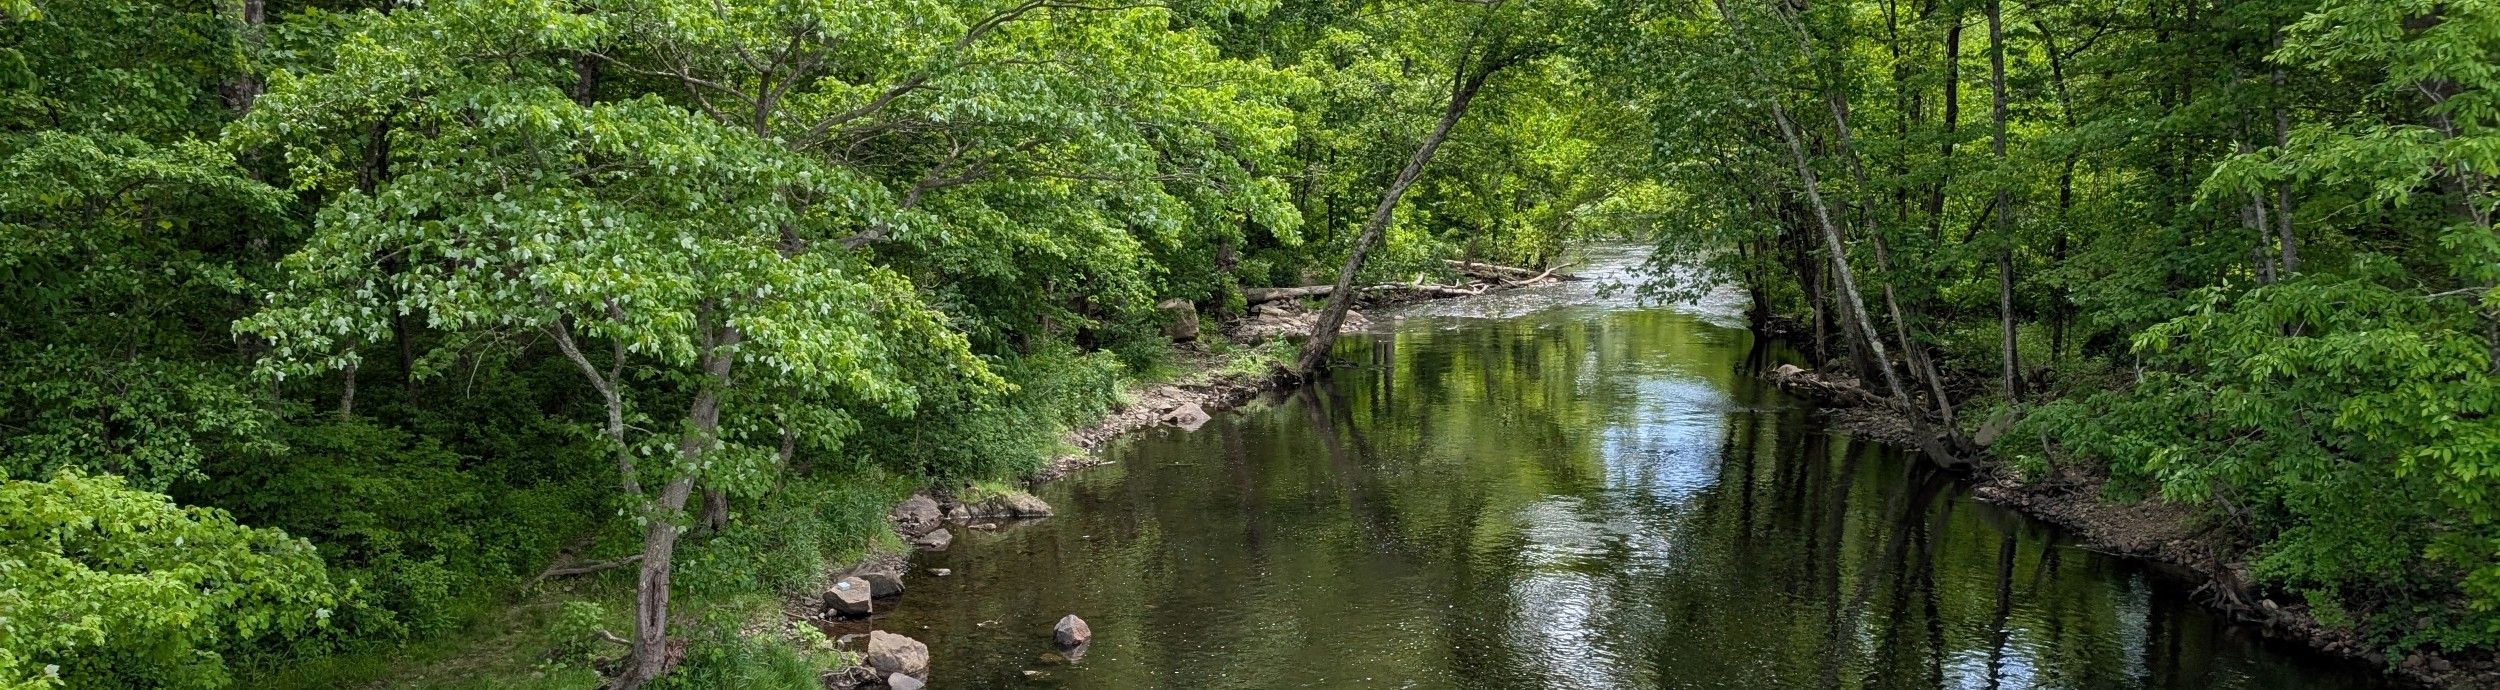
Why should we restore riparian zones?
Riparian plantings are vegetation corridors directly adjacent to the water’s edge separating the water from upland areas. These are critical interfaces between land and water, and restoring them with native plantings can play a significant role in protecting water quality and aquatic habitats. Riparian corridors provide many useful functions, including filtration of stormwater runoff. Increases in impervious surfaces, such as roads, parking lots, and roofs, can cause greater storm runoff carrying pollutants, sediments and nutrients into our waterways. Riparian corridors slow water runoff (both surface flow and subsurface flow), minimize erosion, trap and filter pollutants and nutrients, and provide important wildlife habitat. Planting vegetation along waterways can also help mitigate increasing surface water temperatures by providing shade, thereby improving habitat for fish and other aquatic organisms that require cooler environments. When done properly, riparian corridors also provide privacy, increase property value, and beautify the landscape.
Interested in looking at impervious surfaces in your community? Check out the Riparian map and the Built Environment Layers in the CT ECO Advanced Viewer!
The information on this page uses documentation from fact sheets written by Juliana Barrett (Associate Extension Educator with CT Sea Grant) and Mark Brand (Professor with UConn Horticulture) and funded by the LIS Futures Fund Grant.
Erosion
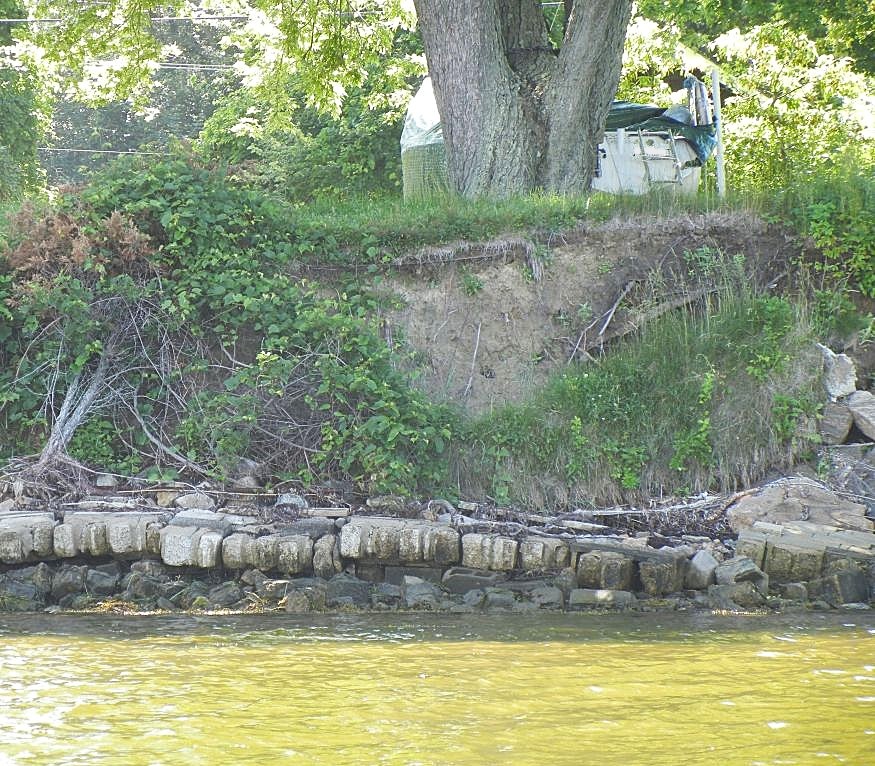
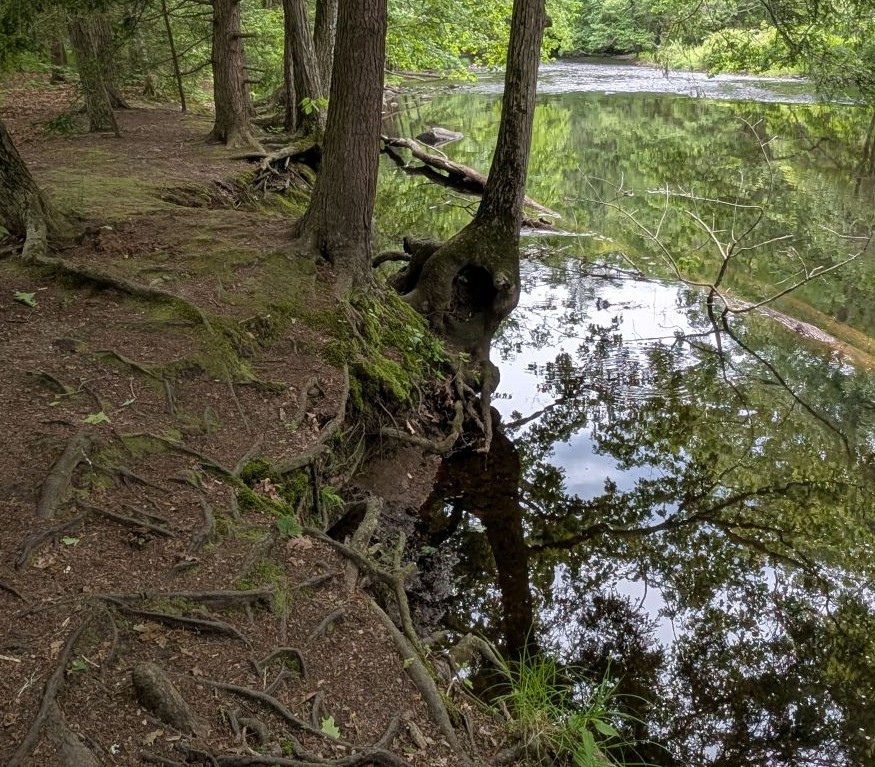
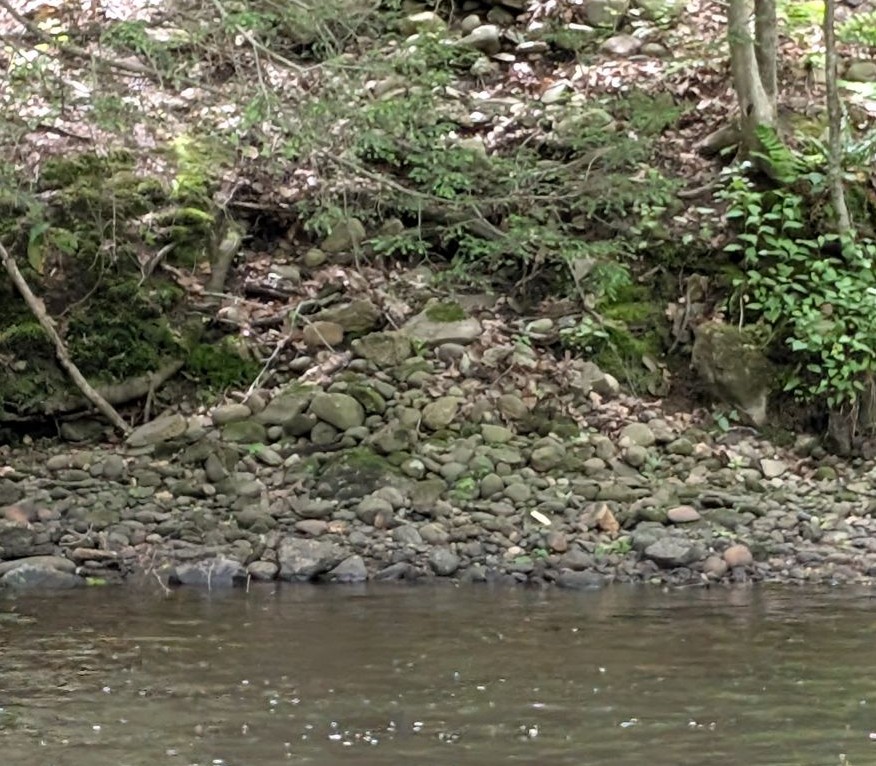
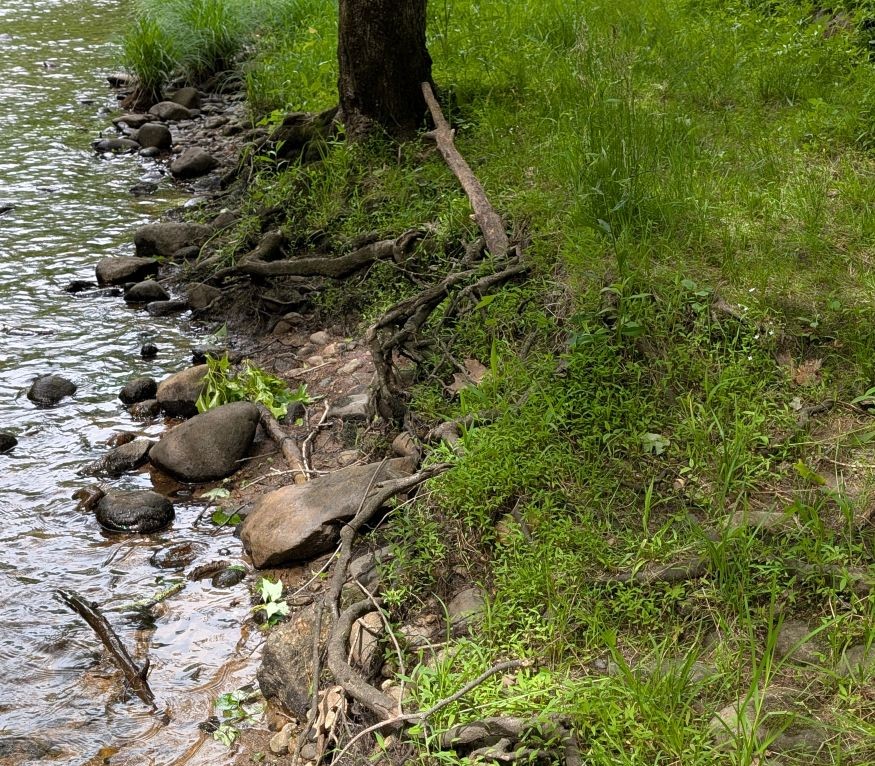
Do you see evidence of shoreline or bank erosion around your waterbody? This is often one of the most obvious indicators of a degraded riparian zone. Visual evidence of erosion can take many forms but often include large chunks of shoreline breaking off and falling into the water (also called bank slumping), bank undercutting, and heavily exposed roots from the vegetation in the riparian zone.
Lots of Impervious Surface
Impervious surfaces, like roads and parking lots, prevent water from absorbing into the ground below. This can be detrimental to riparian areas because decreased water infiltration can result in heavy runoff, especially during large storm events, which can quickly turn into destructive sheets of water and overwhelm shorelines. Stormwater runoff results in severe bank erosion, pollution transport, such as from oils and heavy metals that may be on roadways, and habitat and plant decline.
Lack of Diverse Vegetation
Does your property feature lawn-to-waterbody landscaping? This is when manicured lawn is maintained up to the water's edge. While this may look clean, turf grass roots are too shallow and weak to prevent erosion during large storm events. This landscaping also provides minimal benefits to pollinators and other wildlife. Lawn is also less effective at filtering stormwater runoff, which can lead to chemicals and fertilizers entering the waterway. There are many plants in the Riparian Plant List below that are beautiful and benefit the local ecosystem without interrupting your views!
Invasive Species

Non-native invasive species are plants, animals, and other organisms that have been introduced to our region from other areas of the world. Invasive species can quickly overpower an ecosystem because they lack the predation, disease or other means for thinning that would be present in their native region. In riparian areas, invasive vegetation, such as Japanese barberry (Berberis thunbergii) and common reed (Phragmites australis), tend to pose the largest threat. These species can outcompete native vegetation and tend to be poor wildlife habitat, which results in decreased biodiversity, and often lack robust root structures that stabilize banks.
See the Common Invasives and Their Control (Site Preparation) section below for more information on invasive species in riparian areas.
Have an area to restore? See the steps below to get started!
There are two common situations that are likely to exist for property owners when preparing a coastal area for installation of a riparian buffer planting. Often a riparian planting will be replacing an area of mowed turf grass. In other cases, riparian plantings will be replacing mixed woody and herbaceous perennial plants, most likely comprised of some native species and invasive exotic species. These two types of vegetation will need to be handled differently to successfully prepare an area for establishment of a riparian planting.
NOTE: Any work in a wetland or tidal area may need approval from your local inland wetlands commission or CT DEEP. Contact your town inland wetlands agent for more information.
Preparation of an area of lawn grass
Most riparian areas will have a slope to the landscape, since this is the area where the land gradates to the water. In some locations the slope may be quite gradual, while in others it may be very steep. To limit erosion on slopes prior to the establishment of the riparian vegetation, the best approach with lawn areas is to kill the turf, but leave it in place and plant through the dead grass residue. The leaf residue and the dead roots will continue to hold the soil in place for a period of time while the new riparian plants are installed and become established. Mulch can be applied directly over the killed vegetation if desired.
Using a non-selective herbicide
Perhaps the easiest and most effective way to kill large areas of lawn grass is to use a non-selective herbicide containing the active ingredient glyphosate (commonly known as Roundup). Glyphosate can be applied to lawns anytime there is active turfgrass growth and it will be effective at killing most grass species and common lawn weeds. Glyphosate is relatively safe to use and does not persist or bioaccumulate in the environment, but it must have sufficient time to dry on the foliage prior to a rain or irrigation event. Once glyphosate is absorbed through the leaves of the plants it is translocated into the roots and rhizomes of grass and weeds, killing the plants completely. Before using an herbicide in close proximity to a waterway, be sure to check that it is legal to make herbicide applications to your property. If you do not wish to use herbicide, or herbicide use is not allowed on your property, there are other options that can be used to kill lawn.
Using newspaper or cardboard layering
This method can be effective, but will take time to kill the grass and lawn weeds. It is also not that practical on sites with very steep slopes. Start this process by mowing the lawn as short as possible. The turf should then be covered with 8 to 10 layers of newspaper or cardboard. Choose a calm day to do this so the newspaper is less likely to blow away and utilize small rocks to hold the paper in place. The paper layers should then be covered with 4” to 6” of organic mulch. The organic mulch can be wood chips, bark chips, or partially composted chopped leaves. Water the mulch thoroughly to settle it and add weight to the layer. Over the course of 2 to 3 months, the vegetation will be killed off due to lack of light and air circulation. In general this method has to be employed during the growing season to be effective. Even when done correctly, it is likely that some tough, durable plants will survive the process and need to be mechanically removed. Planting of new riparian species should be possible directly through the paper and mulch layer once the old lawn has died off.
Using vinegar sprays
If you would like to use a spray, but do not wish to use a synthetic herbicide, you may be able to use vinegar to kill your lawn. The approach is usually best applied to smaller areas of turf primarily due to the cost of vinegar. The active ingredient in vinegar is acetic acid and you will want to use vinegar that has the highest available acetic acid concentration. This is usually white or pickled vinegar, which will contain 5% or slightly higher acetic acid. To get the best results with vinegar sprays, choose a period where the forecast calls for a few consecutive days of warm temperatures and sun. Mix full strength vinegar with some dish soap (1 gal of vinegar plus 1 oz. of dish soap) to increase the efficacy of the vinegar to kill plants. Apply the vinegar on a calm day to avoid drift of the spray. It will take at least two days to begin to see the plants dying. It is likely that the vinegar spray will have to be repeated one or more times to produce acceptable results.
Using solarization
Soil solarization is a nonchemical method for killing lawn and weeds using high temperatures produced by capturing radiant energy from the sun. The method involves heating the soil by covering it with a clear plastic tarp for 4 to 6 weeks during a hot period of the year when the soil will receive the most direct sunlight. When properly done, the top 6 inches of the soil will heat up to as high as 140°F, depending on the location. The top 12 to 18 inches of soil will usually get sufficiently warm to kill turf and many weed roots and rhizomes. Solarization can only be used to kill turf that receives full sun exposure. Shaded or partially shaded lawn areas will not be killed sufficiently by solarization. Optimum conditions for control (good soil moisture, tightfitting plastic, and high solar radiation) are needed to kill tougher plants, especially those with deep roots or rhizomes. Results from solarization can be inconsistent, even under favorable conditions. The area being treated also looks unsightly for a couple of months. When attempting solarization, first mow the grass very short, and then water it heavily to saturate the soil and cover with clear plastic sheeting. Be sure to seal down the edges of the plastic so that the moisture and heat are trapped beneath the plastic.
Using mechanical removal
The quickest method of removing a lawn is to dig it out. This is a very labor intensive process, but it can be made easier using a sod cutter. This machine removes the grass and a thin layer of soil in strips. Sod strips cut from the lawn can be turned over and left in place or composted in another location. Alternatively, there are hand tools designed to cut thin layers of lawn sod from the soil. If lawn is going to be mechanically removed, riparian plants should be installed and mulched in immediately to avoid erosion which could occur to the bare soil during a significant rain event. While sod removal is a fairly complete process, it is possible that grass and weed rhizomes or roots could remain in the soil and regenerate some plants in the future. One other drawback to sod removal is that a significant amount of organic matter and topsoil can be lost with the removed sod. Frequently, coastal soils are sandy and have only a thin layer of topsoil with limited organic matter, so minimizing their loss is important.
If you choose to mechanically remove turf, there is an opportunity to add organic matter or compost to the soil if it is deficient in this area. A 3” layer of compost or peat moss can be spread over the area where the lawn has been removed and cultivated into the bare soil with a rototiller. Before deciding to add compost to the riparian planting area, be sure that the soil is very deficient in organic matter and nutrients based on a soil test. Generally adding organic matter to soils is beneficial, but it will add cost to the project, require extra labor, can potential bring in new weed seeds or propagules and have a minimal impact on the long term success of the riparian planting if properly adapted plants are selected for the site.
Preparation of an area of mixed vegetation: woody and herbaceous plants
For areas that are not in lawn, but are instead covered with a mix of woody shrubs, small trees, vines and herbaceous perennial plants, the first step is to determine if there are any plants in the area that are native and would be desirable to save and incorporate into the new riparian planting and landscape. There are many resources available that can help you identify plants on your property.
Helpful websites for plant identification:
There's also an app for that! Search "plant identifier" in your app store or consider these popular apps:
- PictureThis - Plant Identifier
- PlantNet
- Seek by iNaturalist
Note: The identification results from these apps may not always be accurate and should be verified through further research.
Mechanical removal of plants
One way to prepare an area containing mixed woody and herbaceous vegetation for riparian planting is to physically dig up and remove the plant material, including the underground roots and rhizomes. This can be done by hand, or using machinery. This method quickly removes the unwanted vegetation and the area is then ready for riparian plant establishment. Mechanical removal can be very labor intensive and expensive. In addition, remnant roots and rhizomes that can get left behind may regenerate plants and because the soil is disturbed during plant removal, replanting must occur immediately to avoid erosion on sloped areas.
Using non-selective systemic herbicides
Systemic herbicides are absorbed into the plant foliage and stems and are then translocated into the roots and underground portions of the plant where they accumulate and kill the plant tissue. Systemic herbicides sprayed at the end of the summer are often most effective because this is the time of the year when plants transfers nutrients, carbohydrates and the herbicide from the foliage to the roots in preparation for winter dormancy. The two most effective and commonly used systemic herbicides for controlling mixed perennial vegetation are glyphosate and triclopyr. With both of these herbicides it is recommended that a surfactant be used which will enhance the efficacy of the herbicide by improving coverage of the herbicide as well as its absorption. Some formulations of these herbicides will already have the surfactant included with the herbicide.
- Glyphosate (Roundup®) will control broadleaf plants as well as grasses and sedges, but it may take more than two weeks for plants to die. To control woody plants and tough herbaceous perennials most effectively with glyphosate containing herbicide formulations, it is important to make applications at the end of the summer (usually mid-August through early September). Woody plants, in particular, may appear relatively unaffected by the herbicide at this time of year, but leaves will fail to emerge from buds the following spring or will be stunted and distorted. Glyphosate is rapidly deactivated and biodegraded when it contacts the soil and it presents a low environmental risk.
- Triclopyr (Brush-B-Gone, Weed Killer) will control most broadleaf plants, but will not be effective against grasses and sedges. In comparison to glyphosate, triclopyr is faster acting and plants will usually show damage with 24 hours and will die within a few to several days. This herbicide is best applied to plants when they are in active growth, so earlier in the growing season (May through July) is the best time for application. In general, triclopyr will be more effective at killing woody plants than glyphosate. Formulations containing triclopyr are especially useful on freshly cut stumps to prevent resprouting. Triclopyr is also a relatively safe herbicide, but carries slightly more environmental and human risk than glyphosate.
There are different ways that systemic herbicides can be used to kill existing vegetation in an area designated for a riparian planting. Foliar sprays of an herbicide using a backpack or hand held sprayer can be very effective. Foliar sprays use a relatively diluted application of herbicide. Foliar sprays are ideally suited to areas where control is needed for herbaceous perennial plants and low growing dense brush. Spray should be applied to the leaves and stems to the drip point. It may be necessary to repeat an application to achieve complete control.
Using a Foliar wipe is another technique where somewhat more concentrated herbicide solution is painted, wiped, or swabbed on the plant foliage. Paint brushes, special wick applicators, or plastic gloves inside
cloth gloves can be used to apply the herbicide to plant material in a very focused and directed fashion. Foliar wiping can be very useful to kill plants surrounding desirable plants that are to be retained. With foliar wiping there is little risk to non-target plants resulting from spray drift.
Cut stump applications of concentrated herbicide can be painted, sprayed or sponged onto cut off stumps and stems to prevent resprouting. This method is very useful for larger stem diameter plant material such as large vines, shrubs and small trees where aerial foliar sprays would produce too much spray drift and damage to non-target plants. It is often recommended to mix the herbicide with fuel oil or kerosene to make it more effective. Efficacy will be best when cut stump applications are made at the end of the summer. Repeat applications may be necessary.
Whatever process you choose, be sure to follow manufacturers safety instructions for application and storage. Eye protection and gloves are recommended.
A wide variety of invasive herbaceous and woody invasive plants have become established in many areas. It is likely that at least some of the vegetation that will need to be controlled in preparation for installation of a riparian planting will be one or more species of invasive plant. Below is a listing of some of the most commonly found invasive species and approaches that can be used to successfully control and remove them prior to installing a riparian planting. This is not a complete list, see the Connecticut Invasive Plant Working Group or the UConn Integrated Pest management Invasive Species page for more information.
Common reed
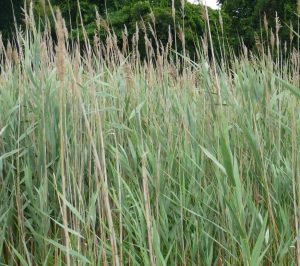
Common reed (Phragmites australis) - this wetland grass is commonly found along the shorelines of lakes, ponds and marshes. It is also often seen along roadside ditches. Growing to over 12 ft, the plants form thick, almost impenetrable stands spreading from underground stems called rhizomes as well as through seeds. Plants have stiff, hollow upright stems with blue green to green leaves and feathery clusters of flowers. Native to Europe where it is still used as thatch for roofs, these plants aggressively outcompete native plants and can change the hydrology of a wetland area. There is a native species of Phragmites (Phragmites americanus) which is shorter and much less aggressive.
Purple loosestrife
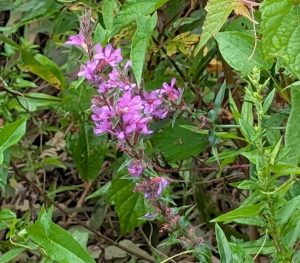
Purple loosestrife (Lythrum salicaria) - this wetland plant is highly aggressive and crowds out native plants. While a pollen source for bees, it can negatively impact wildlife habitats. Purple loosestrife is easily identified by its bright purple/magenta flowers in low spikes seen from July to September. Stems are four sided (square) with leaves usually growing opposite (two leaves per node on the stem) or whorled (three or more leaves per node).
Japanese silt grass
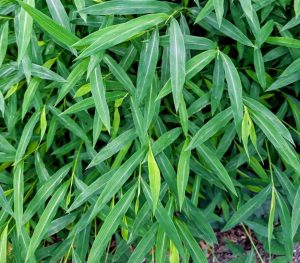
Japanese stilt grass (Microstegium viminium) – Looking a bit like a miniature bamboo plant, this grass has short (1 to 3 inches), bright green, lance shaped leaves with a silvery stripe that is just off-center on each leaf blade. Plants grow 1 to 3 ft in height and can form dense carpets in shaded, moist areas such as floodplains.
Mugwort
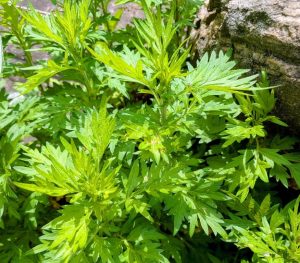
Mugwort (Artemisia vulgaris) – this tall perennial herb has fragrant leaves and a long history of medicinal use. It grows 2 to 6 ft tall with alternate leaves along the stem that are deeply lobed. The leaves are dark green with silver-white woolly undersides. The plants spread by seed and by aggressive rhizomes (underground stems). It can commonly be found along roadsides, meadows, and fields.
Oriental bittersweet
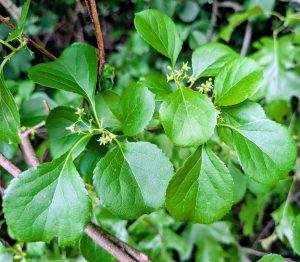
Oriental Bittersweet (Celastrus orbiculatus) – this is a woody, deciduous, perennial vine that is native to many parts of Asia (another common name for this plant is Asiatic bittersweet) and climbs by twining around objects. There are male and female plants and fruits are produced in clusters from the leaf axils of female plants in the fall. Fruits are rounded, about the size of a pea, with the yellow capsule splitting to reveal orange arils inside. This vine can be seen covering plants near the ground as well as growing up tree trunks where it can smother the tree by blocking sunlight and girdling/strangling the stems/trunk. Trees laden with bittersweet are also more prone to snapping or blowing over during strong wind events or ice storms due to the massive weight of the vines. Birds carry the brightly colored (yellow/orange) fruits helping to spread new plants. The leaves along the vine are alternately arranged, somewhat rounded, and are about 3 to 4 inches long with toothed edges. Leaves turn yellow in the fall.
Japanese barberry
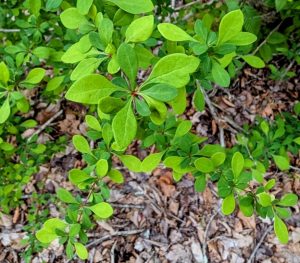
Japanese barberry (Berberis thunbergii) – this thorny shrub was widely planted as hedges and for its bright red/maroon fall foliage. Birds spread the bright red seeds, and this shrub is now common in forests and floodplains throughout Connecticut. The shrubs create a humid environment that harbors deer ticks. The plant is easy to recognize with small oval leaves with smooth edges. Leaves form clusters along the stems with a single sharp thorn below each leaf cluster. Berries are egg shaped and bright red.
Honeysuckle
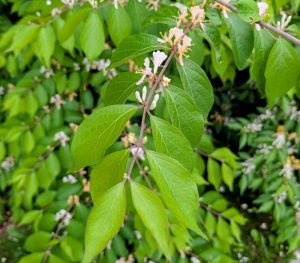
Honeysuckle shrubs and lianas (woody vines) (Lonicera species) – There are 9 species of honeysuckle that occur in Connecticut of which 3 are lianas. Of the 9 nine species, 4 are considered invasive species. Honeysuckle shrubs can be recognized by their opposite leaf pattern (leaves are directly opposite each other along the stem) and have smooth edges with no teeth. On the invasive shrubs, small tubular flowers grow in pairs and often start out white or pink, turning yellow over time. The exception - Tartarian honeysuckle (Lonicera tartarica) often has pink to red flowers. One of the easiest ways to differentiate native versus non-native shrub honeysuckles is to look at the pith – the central core of the stem. Cut an older branch off of a plant and the pith is hollow on non-native honeysuckles, and solid on native species.
Autumn olive and Russian olive
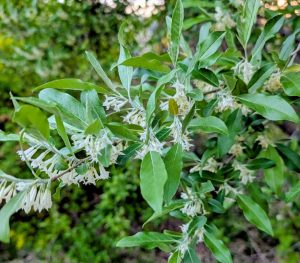
Autumn olive (Elaeagnus umbellata) – a multi-stemmed shrub and can grow up to 20 ft wide and tall. Leaves are arranged alternately along the stems and are gray green on top and silvery-white on the bottom. Plants produce copious berries that are bright red in the late summer and fall. This species can thrive in a wide range of conditions as it can fix nitrogen.
Russian olive (Elaeagnus angustifolia) – also a nitrogen fixing shrub found in a wide range of habitats but prefers moister soils. Leaves are arranged alternately along the stems, are long and narrow (about 2 to 4 inches long) and are silvery on both the top and bottom. Branches often have sharp thorns that are 1 to 2 inches long.
Burning bush
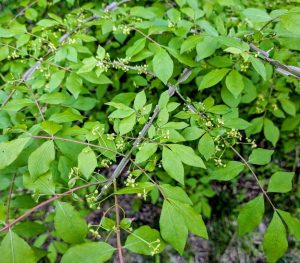
Burning bush/winged euonymous (Euonymous alatus) – This multistemmed shrub can grow to 15 ft in height. Leaves are shaped like a football (elliptical) and turn bright red/scarlet in the fall. Branches have raised, corky, ridge-like "wings" running lengthwise, giving it the name “winged” euonymous.
Multiflora rose
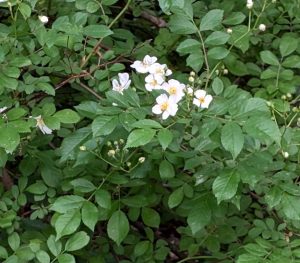
Multiflora rose (Rosa multiflora) – This multistemmed shrub produces arching branches with curved thorns. Leaves are compound – made up of 5 to 11 leaflets and are arranged alternately along the stem. The easiest way to distinguish this rose from other common roses is to look at the base of each leaf stalk where it meets the stem. The stipule (an appendage that is part of the leaf found at the base of the leaf where it meets the stem) is fringed in multiflora rose.
Garlic mustard
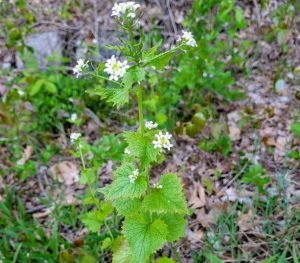
Garlic mustard (Alliaria petiolata) – this plant is a biennial plant that looks different between its first and second years. The first year plants form a basal rosette of leaves close to the ground with leaves kidney-shaped or rounded with scalloped, toothed edges. Second year plants produce a tall slender stem growing 1 to 3 ft tall. Leaves higher up on the stem become more triangular or heart-shaped with sharp, toothed edges. Flowers grow in small clusters with each flower having 4 white petals.
Choosing Plants
Use Native Plants
A plant is considered “native” by the Native Plant Trust if it is “indigenous and naturally occurring in the area without human introduction.” We suggest using native plants when restoring riparian zones. While native plants are not always as showy as horticultural varieties, they provide many practical and ecological benefits that make them ideal for these areas. Native plants have occurred in an area for thousands of years and therefore are well adapted to soil and moisture conditions. They can also reduce management costs, as they rarely need chemicals or fertilizers, protect soils through erosion control, and can help minimize the spread of invasive plants. Additionally, native plants provide essential food (through pollen, berries, and seeds) and shelter for a variety of wildlife and can act as host plants for many butterfly and moth caterpillars.
The Riparian Plant list below includes a number of native species that are appropriate for riparian restoration.
What are your goals?
Are you looking to reduce erosion, increase pollinator habitat, or shade your waterbody? These goals will influence the plants you may want to consider in your restoration project. For example, plants that are good for erosion control often have deep, extensive root systems (e.g. native grasses), sturdy shrubs and trees with a dense canopy and foliage will help shade a waterway, and many native ground cover plants can have flowers that support pollinators.
Consider the Different Riparian Zones
Certain plants may be more appropriate for different sections of a riparian area. Riparian buffers are generally split into three different "zones":
- Streamside / Toe and Bank Zone
- Location: Directly adjacent to the normal water line and on the lower stream bank.
- Conditions: Saturated, highly prone to flowing water, flooding, and erosion.
- Best Plants: Wetland-tolerant sedges, rushes, grasses, and flexible-stemmed shrubs like silky dogwood or specific shrub willows that bend rather than break in high water. Plants in this area should be able to tolerate frequent flooding and wet soil conditions.
- Middle / Overbank Buffer Zone
- Location: Moving landward from the immediate bank onto the lower floodplain.
- Conditions: Occasionally flooded (every few years) with moist to damp soils.
- Best Plants: Moisture-loving medium-to-large shrubs and trees (such as alder, red-osier dogwood, river birch, and sycamore) that absorb excess nutrients and slow down surface runoff.
- Outer / Transitional Upland Zone
- The furthest landward area bordering residential lawns, fields, or commercial land.
- Conditions: Drier, stable soils that experience only minor runoff during heavy storms.
- Best Plants: This area can include native trees, shrubs, deep-rooted grasses, and herbaceous wildflowers that can help filter pollutants and provide food and habitat for wildlife.
Salt Tolerance
Some regions, such as those near the coast, require plants that are adapted to grow under saline soil conditions. Be sure to check the salt tolerance of the plants before planting them in these regions and check out the Coastal Riparian sections below and under the "Assessment" tab. Also take a look at the salt tolerance of the native plant species in the Riparian Plant list.
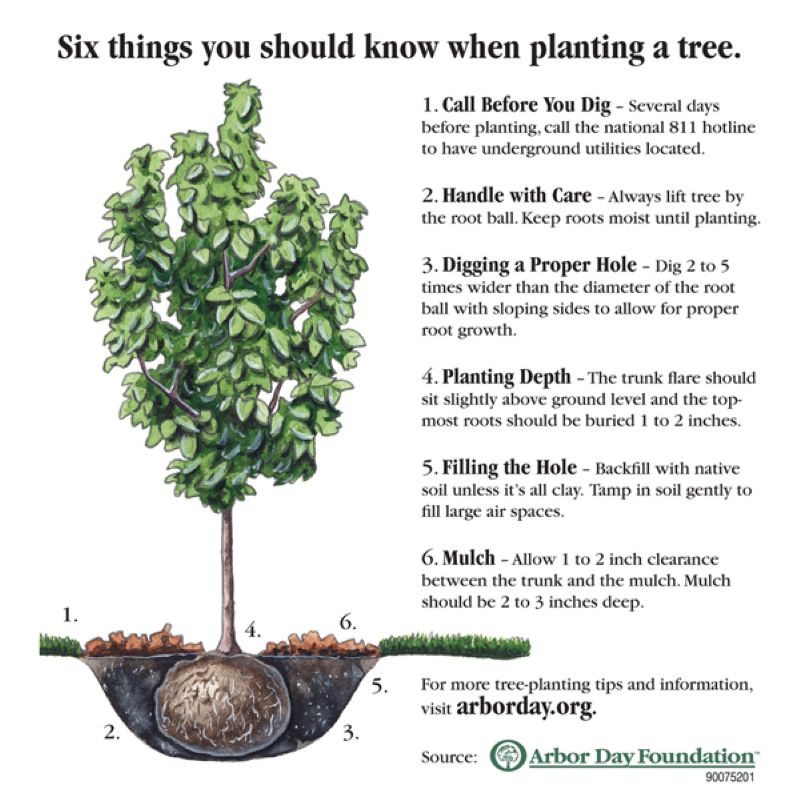
A properly planted tree, shrub or herbaceous perennial will have a high survival rate, grow and establish quickly, perform as expected and be tolerant of adverse conditions. Proper planting techniques must be used in conjunction with proper site preparation activities and proper plants selection for the site and location. Failures in any one of these three aspects of establishing a riparian corridor can lead to unsatisfactory results, damage to the environment, and an unattractive waterfront landscape.
Remember, call before you dig
In Connecticut, call toll free: 1-800-922-4455 or dial 811. Call 2 full working days in advance to locate buried utility pipes and cables. Visit the CT Call Before You Dig page for more information.
Planting Techniques
Container vs. Balled & Burlapped Plants
Trees, shrubs and vines can be purchased in a number of forms, but the two most common forms available are balled and burlapped (B&B) or container-grown plants. B&B plants are those that have been grown in mineral soil in a field setting and they are either hand dug or tree spade dug in the early spring. Growing areas for B&B plants generally have good agricultural soils, so the rootball on these plants will have a mineral soil that is different than the sandy loam soil that exists in some locations.
B&B plants will have biodegradable burlap covering the rootball that is held in place with pins (nails) or is tied. Tree spade dug trees (generally larger tree sizes) will often have their rootball covered with burlap that is framed with a wire basket. The wire basket is necessary to keep the rootballs from falling apart due to their large size and weight. B&B or tree spade dug plants have lost up to 75% of their root system when they were dug (i.e., 75% of the roots remain in the field where the plant was grown), It is important to be aware of this fact when utilizing B&B plants. Do not expect to see significant new top growth on B&B plants during the first growing season. During the establishment year the plant will be putting its resources into restoring its root system and not into top growth.
Container-grown shrubs will most often come in 2 to 5 gallon pots and trees will be in 7 to 25 gallon pots. Container-grown plants are typically grown in a very well-drained organic medium comprised of composted bark, peat moss and sand. During production, container-grown plants are watered nearly every day and are supplied with a constant source of nutrients through controlled release fertilizer prills. The plants grow very rapidly and lushly and are subject to drying out if not watered regularly. Another issue with container-grown plants is that they can easily become pot bound and develop circling roots if grown too long in a particular pot size. Circling roots can lead to girdling roots as the plant grows older in the landscape. Treatments to correct circling roots (see section on “Plant Preparation”) should be employed prior to planting. In general, for sandy coastal soils, it is recommended to use plants in a larger pot sizes when possible. As long as the plants are not pot bound, and proper aftercare is provided, plants with larger root balls should be better able to establish in the sandy soil conditions found along the coast.
Planting Time
balled and burlapped (B&B) and container stock can be planted in the spring, summer or early fall. B&B material is dug in early spring and then healed in to hold it for the season. Once supplies of plants are sold out, new plants cannot be dug until late summer or the following early spring. Container plants are generally available throughout the growing season, but best selection can be found in the spring. Spring is the best time to plant trees, shrubs and vines, but early fall is another good time to plant for many species. Summer planting can also be successful, but special attention will have to be given to regular irrigation. Spring gives plants more time, essentially the whole growing season, to get their roots established. Fall planting is successful for many species because the tops of the plants are going dormant and need less water and nutrients, but the roots continue to grow well into the fall since soil temperature remain warmer than the air temperature.
Planting Hole
A planting hole for a tree or a shrub should be dug two times as wide as the root ball. The hole should only be dug as deep as the root ball depth, so when planted, the top of the root ball is at the same level as the surrounding soil, or slightly higher. In the past, planting recommendations used to suggest digging the hole deeper than the root ball depth and then back filling the bottom of the hole with loosened soil. The problem with this recommendation is that the loosened soil settles and the whole plant sinks into the planting hole, and ends up being planted too deep. Now, the recommendation is for the bottom of the root ball to sit on firm, undisturbed soil so that settling is less likely to occur.
Plant Preparation
When using B&B plant material, try to remove the burlap, twining and/or pins as much as possible. Even though burlap is biodegradable, before it decomposes it can slow root establishment, create air pockets and wick water out of the soil and into the air. If the burlap can’t be completely removed without causing the root ball to break apart, roll back as much of the burlap as possible and cut it off so any remaining burlap will be buried. Buried burlap will not function as a moisture wick to dry out the root ball area. For trees with wire baskets on the root ball, cut away as much of the basket as possible without causing the root ball to fall apart. Although it doesn’t seem as though leaving the wire basket in place would have detrimental effects on plant establishment and growth, research has proven otherwise.
When using container-grown plants for your planting, carefully remove the pot and inspect the root system. In some instances it may be necessary to cut the pot from the root ball. Recently potted plants may not be well-rooted into the entire ball, so care must be taken to not break apart the root ball. In contrast, plants may be root bound or pot bound with lots of roots circling around the bottom part of the root ball. Circling roots need to be corrected prior to planting so there is no longer a potential for development of girdling roots. Girdling roots result from circling surface roots that press against the plant trunk as they grow in diameter, eventually girdling part of the trunk. One method to correct circling roots is to separate and straighten the circling roots with your hands as the plant is being planted.
Alternatively, shallow vertical cuts can be made on four sides of the root ball to cut through the circling roots. The bottom of the root ball must also have criss-cross cuts made into it to sever circling roots. The distal parts of cut roots will die and the remaining root stubs will re-grow roots out into the soil in a non-circling formation.
Backfilling the Hole
In most cases, it is best to backfill the planting hole with the native soil that came out of the hole. In sandy soils, adding 30% organic matter can be helpful for moisture retention, nutrient retention and improving soil texture, but it isn’t necessary. Adding too much organic amendment to the backfill soil should be avoided. Overdoing it with amendment can create unnatural moisture gradients where the organic amended soil and root ball is either wetter or drier than the surrounding soil. Remove roots and rocks from the backfill soil and homogenize the topsoil layer with the lower subsoil layers and any amendment being added.
When the hole has been half backfilled with soil, water it thoroughly to work the soil around the root ball and to minimize air spaces. Finish backfilling, create a 2”to 3” high watering berm around the plant, and water thoroughly. A soil berm will contain the water so it is forced to percolate into the root ball area.
Aftercare
Watering
Newly planted plants will need to be watered regularly during their first year to insure successful establishment. Consistent watering is probably the single most important aspect of plant aftercare. Typically, trees or shrubs will need two to seven gallons of water weekly, but this depends on natural precipitation received, temperatures and wind. Slow application of water is preferred to allow for deep penetration of the irrigation.
Mulching
The best mulch to use is non-dyed, softwood barkbased mulches (pine, spruce, fir, hemlock, or cedar). Mulch allows for better water infiltration, holds soil moisture, moderates root zone temperature, suppresses weeds and helps prevent mower and string trimmer damage. A 3” deep layer of mulch is usually ideal and mulch reapplication should not be at a frequency which allows the depth to increase. Beds or areas of shrubs and herbaceous perennials should have mulch applied throughout the planting. Trees should have a 3’ to 6’ diameter circle of mulch around them, but the mulch depth should thin to nothing as one approaches the trunk. Mulch “volcanoes” around trees are unacceptable and will lead to trunk diseases. In general, the use of porous weed barrier fabric or plastic under mulch is not recommended.
Fertilization
Fertilization during the first growing season is recommended, but do not expect to see dramatic growth stimulation from the fertilization application. During the first year, especially for B&B plants, plants are becoming root established and significant top growth in response to fertilizer is often not seen. The fertilizer is still benefitting the plant even if it isn’t clearly visible as shoot growth. Ideally, fertilizer should be applied based on recommendations stemming from soil test results. Special care must be exercised in riparian areas to avoid nutrient runoff and leaching that can easily pollute the nearby Long Island Sound. A surface applied granular 10-10- 10 (N-P-K) fertilizer is often the most economical choice for riparian plantings. Apply in late April or early May at a rate of 1 to 2 pounds of actual N per 1000 sq. ft. of area. Once established, properly selected riparian species may not require annual fertilization to remain healthy and attractive.
Pruning
Prune out any dead or damaged shoots or branches at planting time. In the past, the recommendation was to remove 25% to 40% of the plant canopy to compensate for root loss during digging, but this practice is no longer promoted. With expanded use of container-grown plants there is not root loss as there is with B&B plants. Also, research has shown that it is better to preserve the canopy so maximum photosynthesis can be realized, which helps build back the root system quickly
Staking
Young trees will do better without staking. Free movement of a tree canopy in the wind causes the trunk to thicken in response to the motion and develop proper trunk taper and flare at the base. Staked trees have “skinny” trunks and are less strong. Only stake trees that are unstable or bend over in winds or after rainfall. Coastal locations often receive relatively strong winds, so staking may be required. Staking materials should use padded ties so the bark isn’t damaged and should allow for some trunk movement. Tree stakes should generally only be left in place for one year.
Planting Techniques for Herbaceous Perennials
Herbaceous perennials are perennial plants whose tops go dormant and die down each fall. They do not develop permanent, above ground woody stems. This group of plants includes flowering perennials, foliage perennials, grasses, sedges and non-woody groundcovers. Herbaceous perennials are commonly sold in quart, 1 gallon and 2 gallon sizes, so digging their planting holes is easier than for large tree and shrub rootballs. If herbaceous perennials are being installed in beds or large groupings, it can be useful to cultivate in a 2” layer of organic matter (compost) over the planting area prior to planting. The organic matter will improve water and nutrient retention in sandy coastal soils.
All herbaceous perennials can be planted in the spring and many can be successfully planted in the fall (late August through early October) as well. Warm season grasses (those that grow optimally in the heat of the summer) should not be fall planted. For fall planting, it is probably better to use larger sized plants since the rootball is larger with a more extensive crown and root system. Larger plants are less likely to heave out of the ground in the freeze-thaw cycles of the winter than smaller plants. The same recommendations made for trees and shrubs regarding planting depth and circling root remediation also apply to herbaceous perennials. Excavating a large hole diameter for herbaceous perennials is not as important as it is for trees and shrubs. Furthermore, digging very wide holes is typically not practical in most herbaceous perennial installations due to the close spacing of plants and the large numbers of plants that are used.
For areas with perennials, a mulch layer between 1” to 2” deep is recommended. Watering during establishment is critical and a weekly 1” application of water should be provided except when substantial natural precipitation is received. Herbaceous perennials will benefit from a surface application of a complete granular fertilizer, such as 10-10-10 (N-P-K) at a rate of 1 pound of actual N per 1000 sq. ft. during their establishment period.
Tools and Other Helpful Information
Riparian Plant List
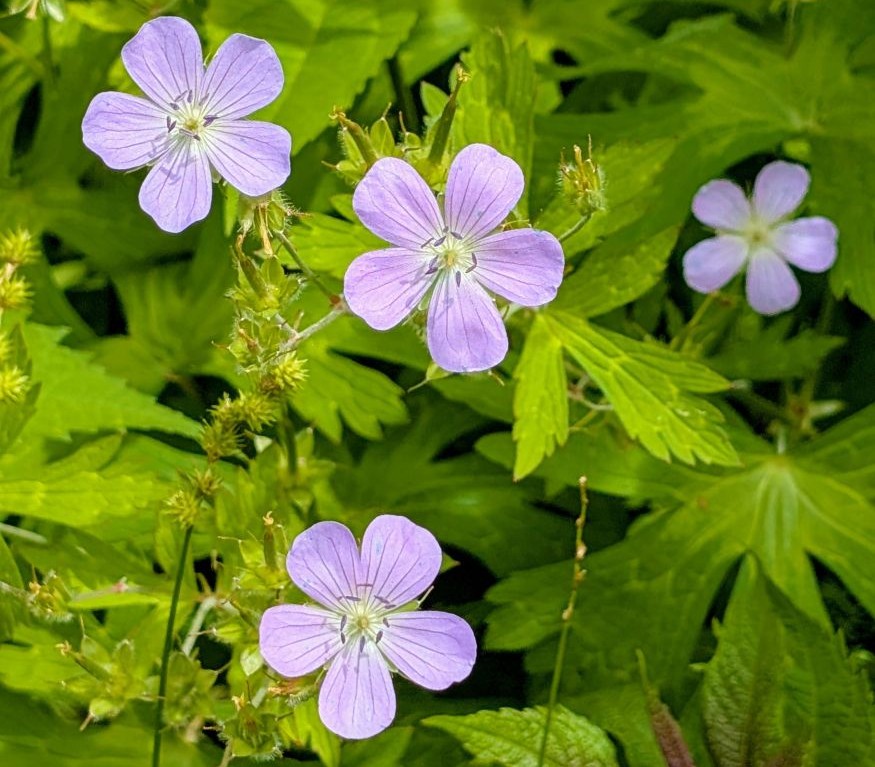
Not sure which plants should go in a riparian zone? See our list of recommended native plants to get started! These plants have been selected based on the benefits they provide to our local ecosystems, such as for valuable wildlife habitat, nectar sources for pollinators, and more.
Coastal Specific Riparian Restoration
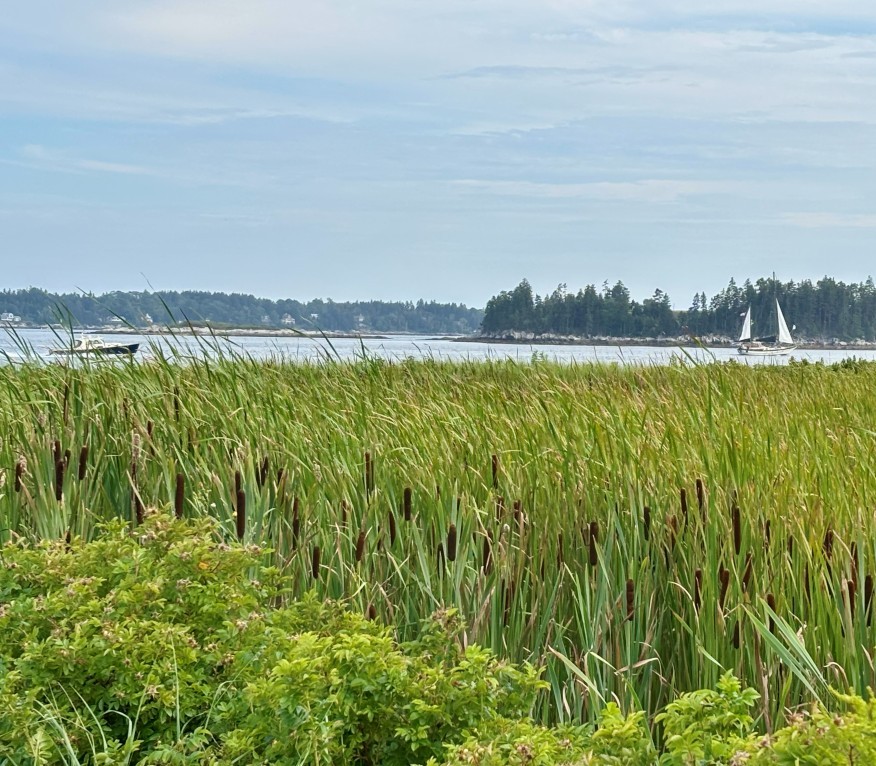
If you are looking to plant along the coast, see the links below to get more comprehensive information on coastal riparian restoration.